 Save
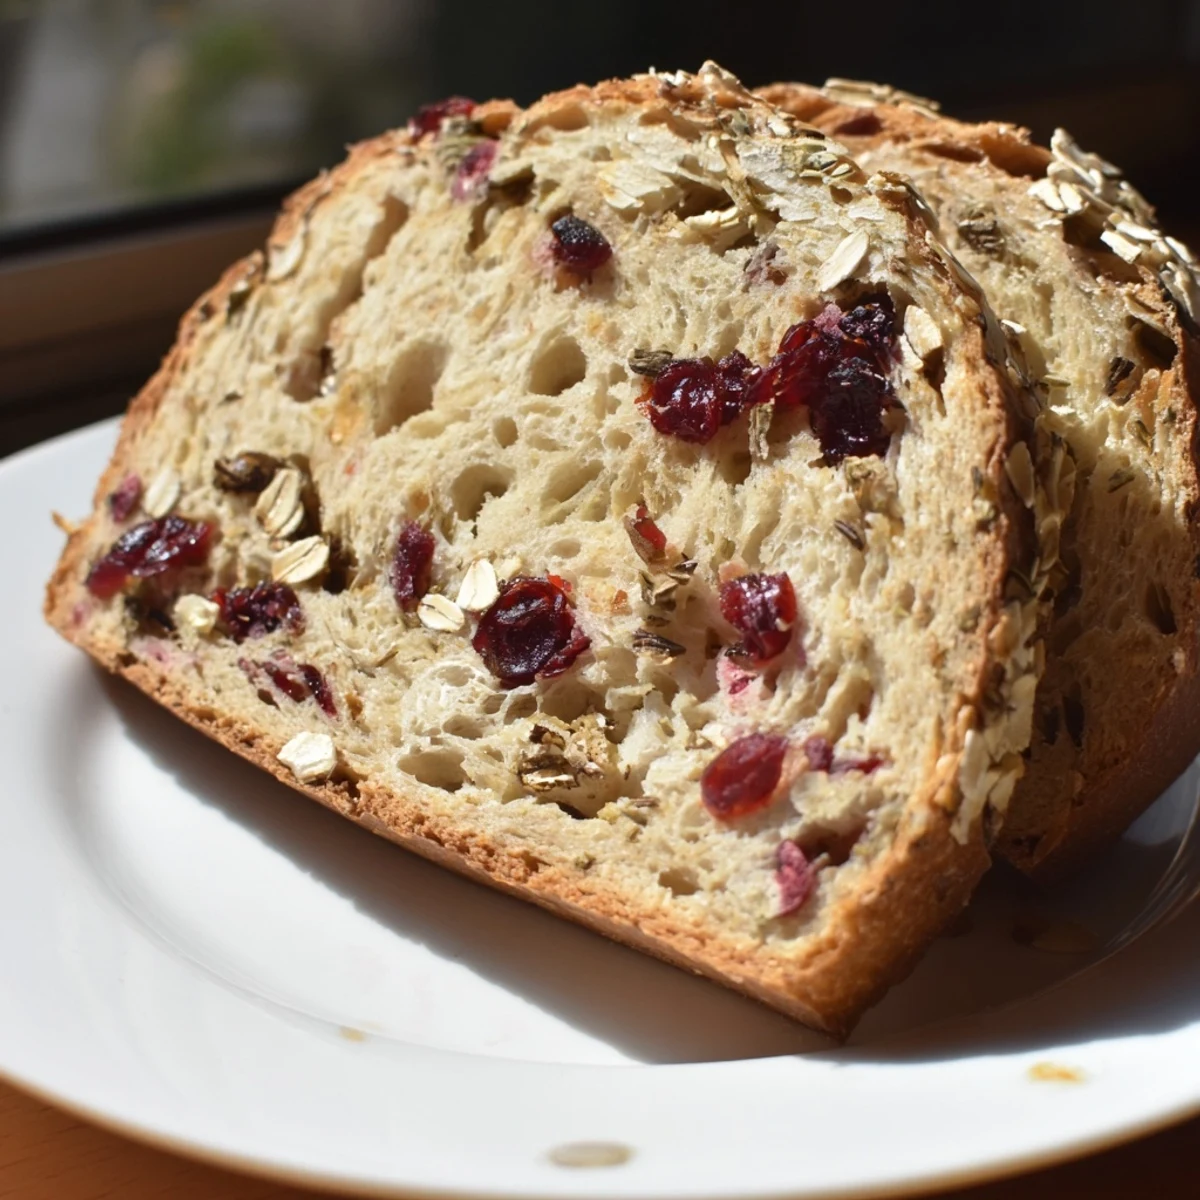
Save This loaf combines the tartness of dried cranberries with fragrant rosemary and thyme, creating a warm, aromatic bread ideal for chilly days. The dough is prepared with bread flour, instant yeast, and a touch of sugar, then enriched with melted butter and warm water. After kneading and two rises, the bread is brushed with olive oil and optionally topped with oats before baking to golden perfection. It pairs wonderfully with whipped honey butter or soft cheeses for a comforting treat.
I still remember the autumn afternoon when my neighbor handed me a warm loaf of cranberry herb bread through her kitchen window, steam rising from the parchment paper. The moment I bit into it, tart cranberries burst against my tongue while rosemary whispered through every bite. That's when I knew I had to learn how to make this myself, to capture that same magic of cozy gatherings and the smell of fresh bread filling a home with warmth.
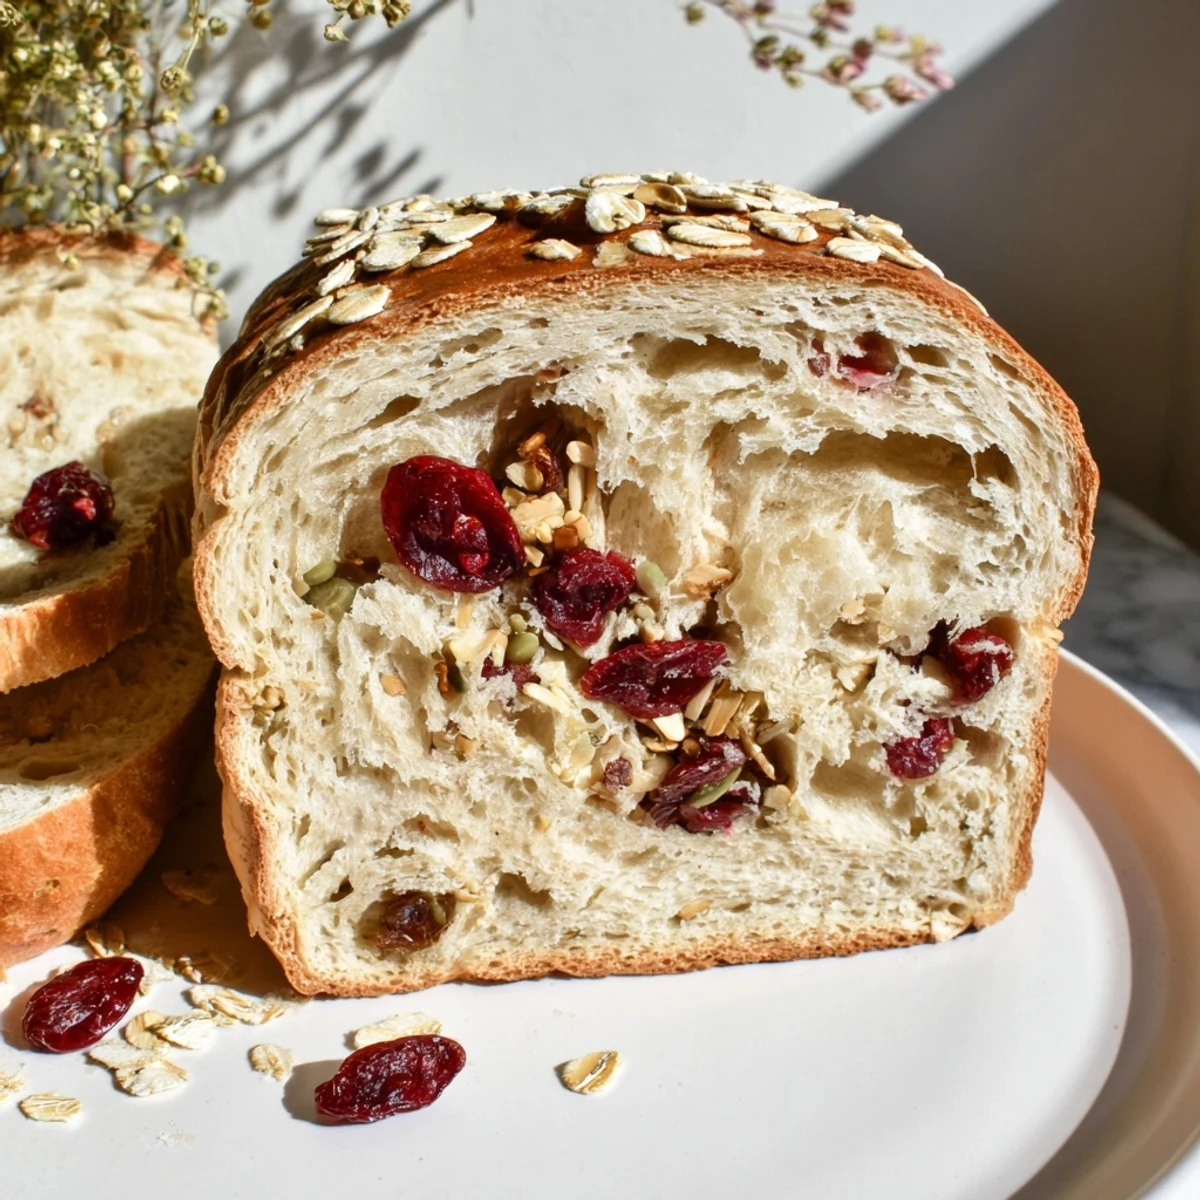
I'll never forget the first time I pulled this bread from the oven for my book club. The women gathered around it like it held secrets, and when I sliced into that golden crust and they saw the speckled pink cranberries throughout, the room went quiet. That's when I realized this bread does more than nourish—it creates moments worth savoring.
Ingredients
- Bread flour (3 cups/375 g): Use bread flour specifically, not all-purpose, because the higher protein content gives you that beautiful structure and chew. I learned this the hard way after my first attempt turned out too dense.
- Instant yeast (2 tsp): This is your rising magic—make sure it's fresh and stored properly, or your dough will stay stubbornly flat.
- Fine sea salt (1 tsp): This small amount seasons the entire loaf beautifully without overwhelming the delicate herbs.
- Granulated sugar (2 tbsp): Sugar feeds the yeast and creates that golden crust, but don't skip it thinking you're being healthy.
- Warm water (1 cup/240 ml at 110°F/43°C): Temperature matters more than you'd think—water that's too hot kills the yeast, too cold and nothing happens. Use a thermometer if you have one.
- Unsalted butter (2 tbsp, melted): This adds richness and helps the dough rise beautifully. It's worth using real butter here.
- Dried cranberries (1 cup/120 g): These provide pops of tartness that balance the herbs. Some people soak them briefly in warm water to plump them up, and I've found it makes a difference.
- Fresh rosemary (2 tbsp, finely chopped): Fresh is non-negotiable here—dried rosemary tastes like pine needles by comparison. Strip the leaves from the stems and chop finely so they distribute evenly.
- Fresh thyme (1 tbsp leaves): Thyme brings an earthy, subtle depth that makes people wonder what you did differently. Strip the tiny leaves from the stems.
- Olive oil (1 tbsp for brushing): This creates that gorgeous shiny crust and helps the oats stick if you choose to add them.
- Rolled oats (1 tbsp, optional): These add texture and look inviting on top, but they're truly optional—your bread is perfect either way.
Instructions
- Mix Your Dry Foundation:
- In a large bowl, whisk together the bread flour, instant yeast, sea salt, and sugar. This step is crucial because you're evenly distributing the yeast and salt so they work together properly. I whisk vigorously for about a minute to make sure everything is combined—you want no clumps of yeast hiding anywhere.
- Create the Dough:
- Pour your warm water and melted butter into the dry ingredients. Mix everything together with a wooden spoon until a shaggy, rough dough forms. It should come together quickly—don't overmix at this stage, just combine everything until there are no dry flour pockets left.
- Fold in the Herbs and Cranberries:
- Now add your chopped rosemary, thyme, and cranberries. Stir gently but thoroughly until the cranberries and herbs are scattered throughout the dough. I like to use my hands at this point to make sure the cranberries don't clump together in one spot.
- Knead into Silky Smoothness:
- Transfer your dough to a lightly floured surface. Knead for 8–10 minutes, using the heel of your hand to push the dough away from you, then fold it back over itself. This is where the magic happens—you'll feel the dough transform from rough and stubborn to smooth and elastic. When you're done, it should feel like soft skin and spring back when you poke it.
- First Rise—Let Time Work for You:
- Place your kneaded dough in a greased bowl, cover it with a clean kitchen towel, and set it in a warm place. A sunny window works beautifully, or the top of your refrigerator. Let it rise for about an hour, until it has roughly doubled in size. You'll know it's ready when you poke it gently and the indentation stays rather than bouncing back.
- Shape Your Loaf:
- Punch down the dough firmly—don't be gentle here, you want to release some of the air. Turn it onto your work surface and shape it into either a round boule or an oval loaf, whichever feels right in your hands. Transfer it to a parchment-lined baking sheet or a greased loaf pan. The shape doesn't need to be perfect; rustic charm is part of the appeal.
- Second Rise—Patience Rewarded:
- Cover your shaped loaf loosely with a towel and let it rise again for 30–40 minutes until it looks puffy and has visibly grown. This is your last chance for the dough to gain volume in the oven, so don't skip this step.
- Prepare Your Oven:
- While your dough is rising, preheat your oven to 375°F (190°C). Let it come to temperature fully—this ensures your bread bakes evenly from the moment it enters.
- Add the Final Touches:
- Brush the top of your loaf generously with olive oil. If you're using rolled oats, sprinkle them over the top now. They'll toast beautifully as the bread bakes and add a lovely textural contrast.
- Bake Until Golden:
- Slide your loaf into the oven and bake for 35–40 minutes, until the top is deep golden brown. You'll know it's truly done when you tap the bottom and it sounds hollow—that's your sign the interior is cooked through. The kitchen will smell incredible during this time.
- Cool and Rest:
- Transfer your bread to a wire rack and let it cool for at least 30 minutes before slicing. I know the temptation is strong, but this resting time lets the crumb set properly. When you finally slice into it, you'll see why the wait was worth it.
 Save
Save Last Thanksgiving, my mother took one bite of this bread and asked if I'd opened a bakery without telling her. We ended up making three more loaves that week because everyone wanted it. That's when I understood—this bread bridges the gap between homemade and professional, and it makes people feel genuinely cared for.
Why These Herbs Matter
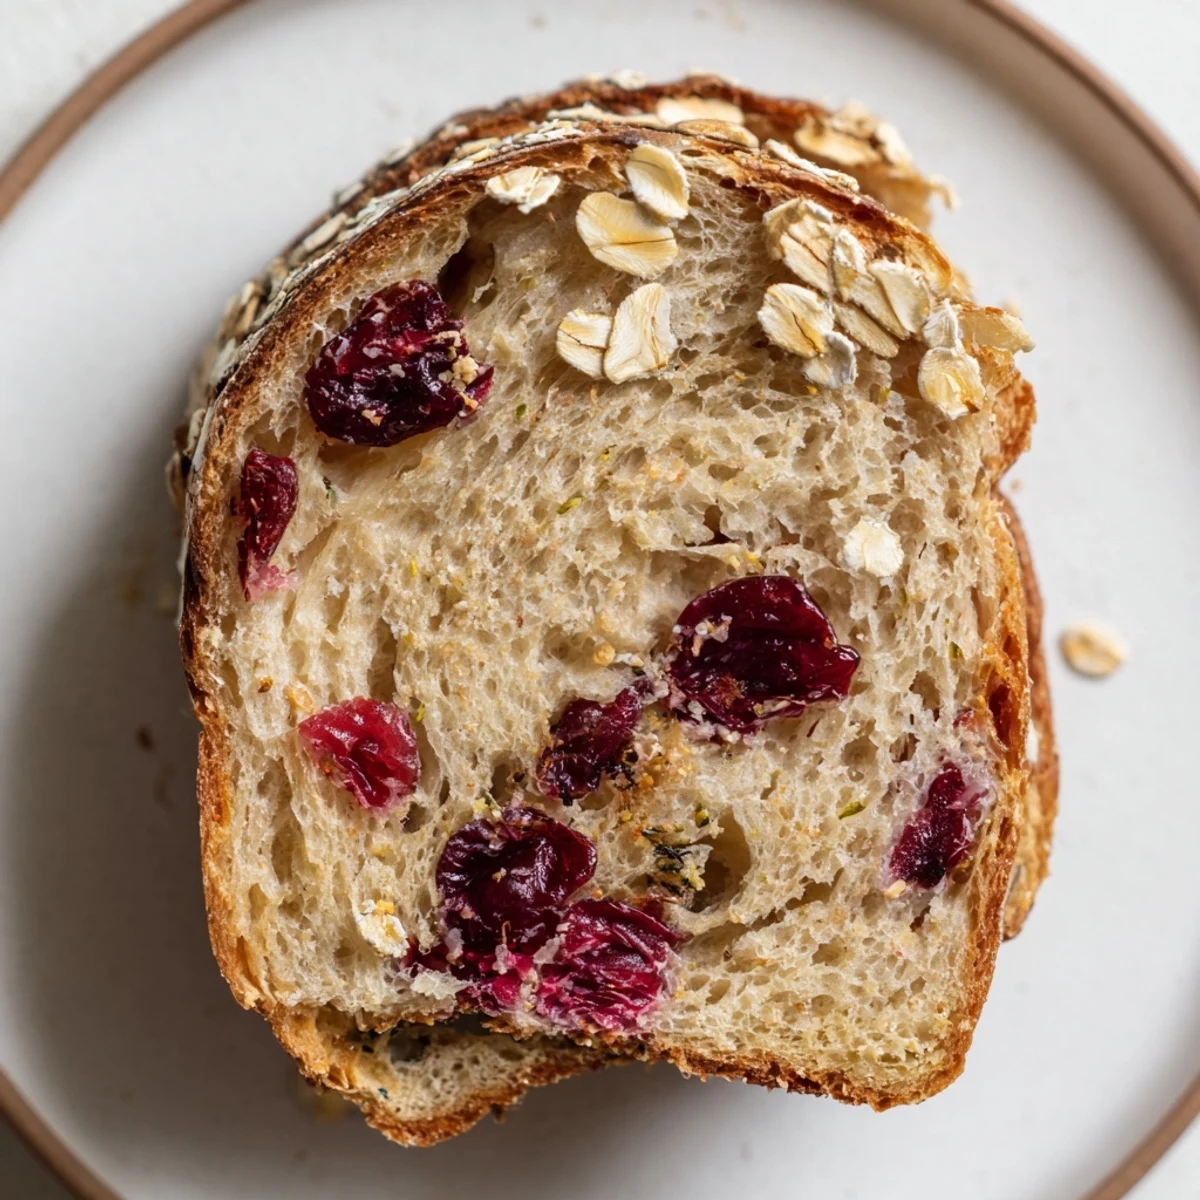
Fresh rosemary and thyme aren't just flavor—they're medicine. Rosemary's piney, almost resinous notes create complexity that dried herbs can't touch, while thyme adds an earthy undertone that makes you pause and wonder what you're tasting. Together, they transform simple bread into something that tastes like an autumnal kitchen garden. I learned to always chop herbs finely so they distribute evenly throughout the dough rather than congregating in one bite. The cranberries act as little flavor counterpoints, their tartness cutting through the herbs and preventing the bread from becoming heavy.
The Cranberry Secret
Cranberries in bread seem like an unusual choice until you taste them. They're not sweet like raisins—they maintain a sophisticated tartness that pairs beautifully with savory herbs and makes this bread feel more elegant than standard bread pudding or herb loaves. I've discovered that some people like to plump their cranberries in warm water for five minutes before adding them to the dough, which softens them slightly and prevents them from being too chewy. Others prefer them kept tart and firm. Either way works, but knowing this gives you control over the final texture.
Serving and Pairing Ideas
This bread is endlessly versatile, which is part of why I find myself making it repeatedly. Serve it warm with whipped honey butter, and people will ask for seconds. Pair it with soft cheeses like brie or goat cheese for a simple lunch that feels fancy. It's excellent alongside a cup of herbal tea or even a dry white wine in the evening. Some of my favorite moments have been slicing this bread still slightly warm and simply eating it plain, with nothing but good company and the quiet satisfaction of something made with care.
- For brunch, serve alongside eggs and fresh fruit—the herbs complement a savory breakfast beautifully.
- Toast day-old slices and serve with soups or stews where the herbs and cranberries add unexpected depth.
- Slice it, freeze it, and toast it throughout the week for quick, homemade toast that tastes better than anything store-bought.
 Save
Save Every time I make this bread, I'm reminded that the best kitchen moments aren't about perfection—they're about generosity, patience, and the simple joy of creating something that brings people together. This loaf does exactly that.
Recipe FAQs
- → What herbs are used in this bread?
-
Fresh rosemary and thyme are finely chopped and incorporated into the dough to provide a fragrant herbal note.
- → Can dried cranberries be substituted?
-
Yes, dried cherries or currants can be used as alternatives to add similar tartness and sweetness.
- → How long should the dough rise?
-
The dough first rises for about 1 hour until doubled, then after shaping it rises again for 30–40 minutes before baking.
- → What is the best way to check if the bread is baked?
-
The loaf should be golden brown and sound hollow when tapped on the bottom, indicating it's fully baked.
- → Are there dairy-free options for this bread?
-
Butter can be substituted with olive oil or vegan margarine for a dairy-free version.
- → What serving suggestions complement this bread?
-
Serve with whipped honey butter, soft cheeses, herbal teas, or dry white wine to enhance its flavors.