 Save
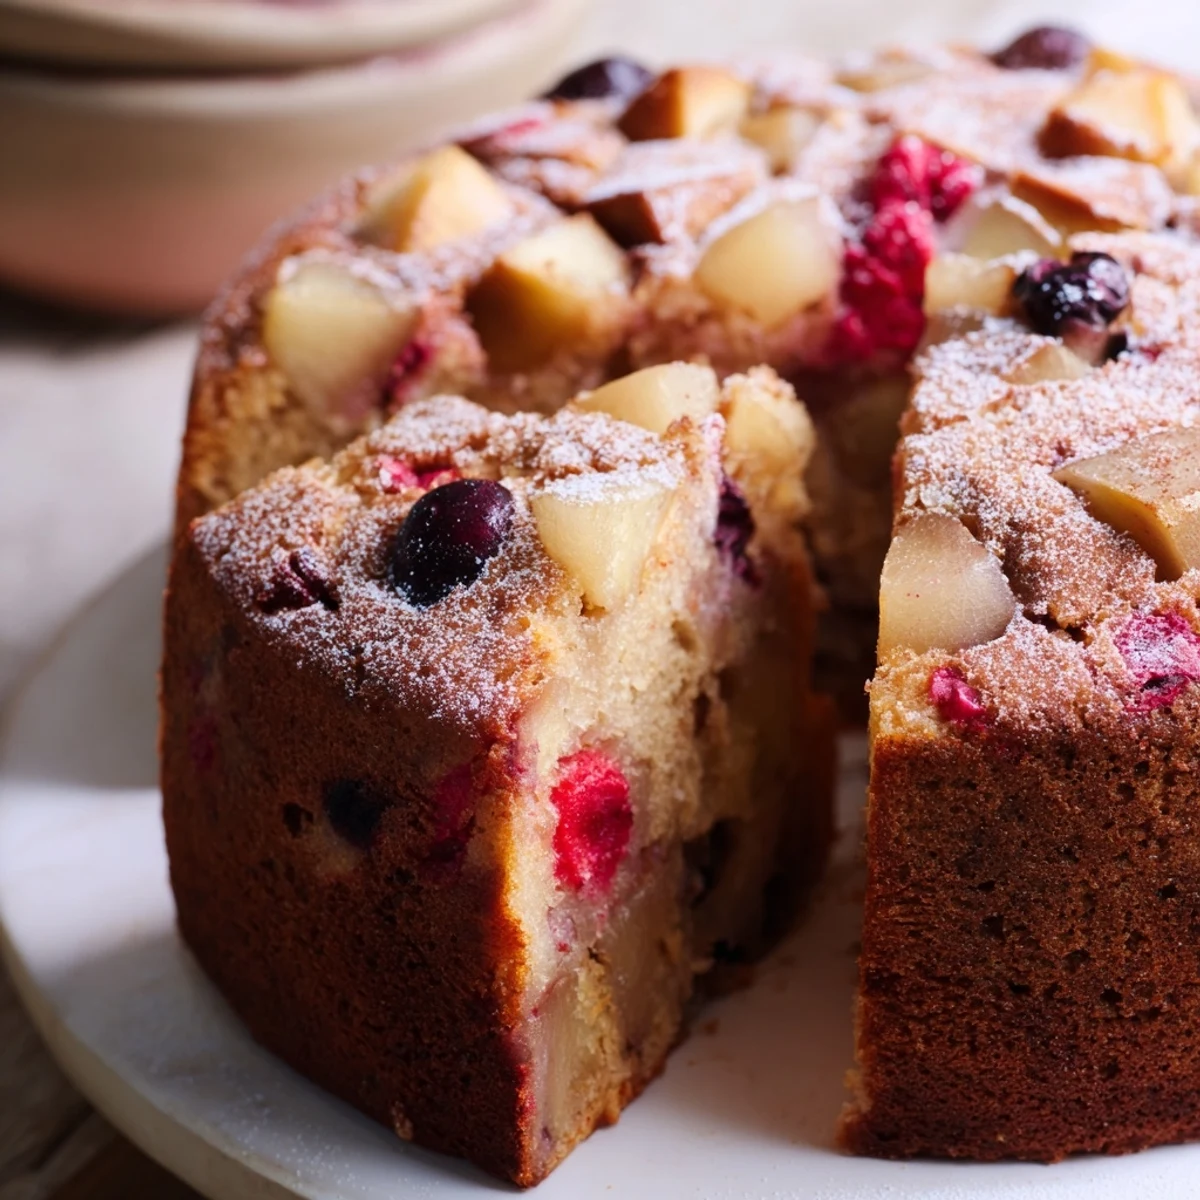
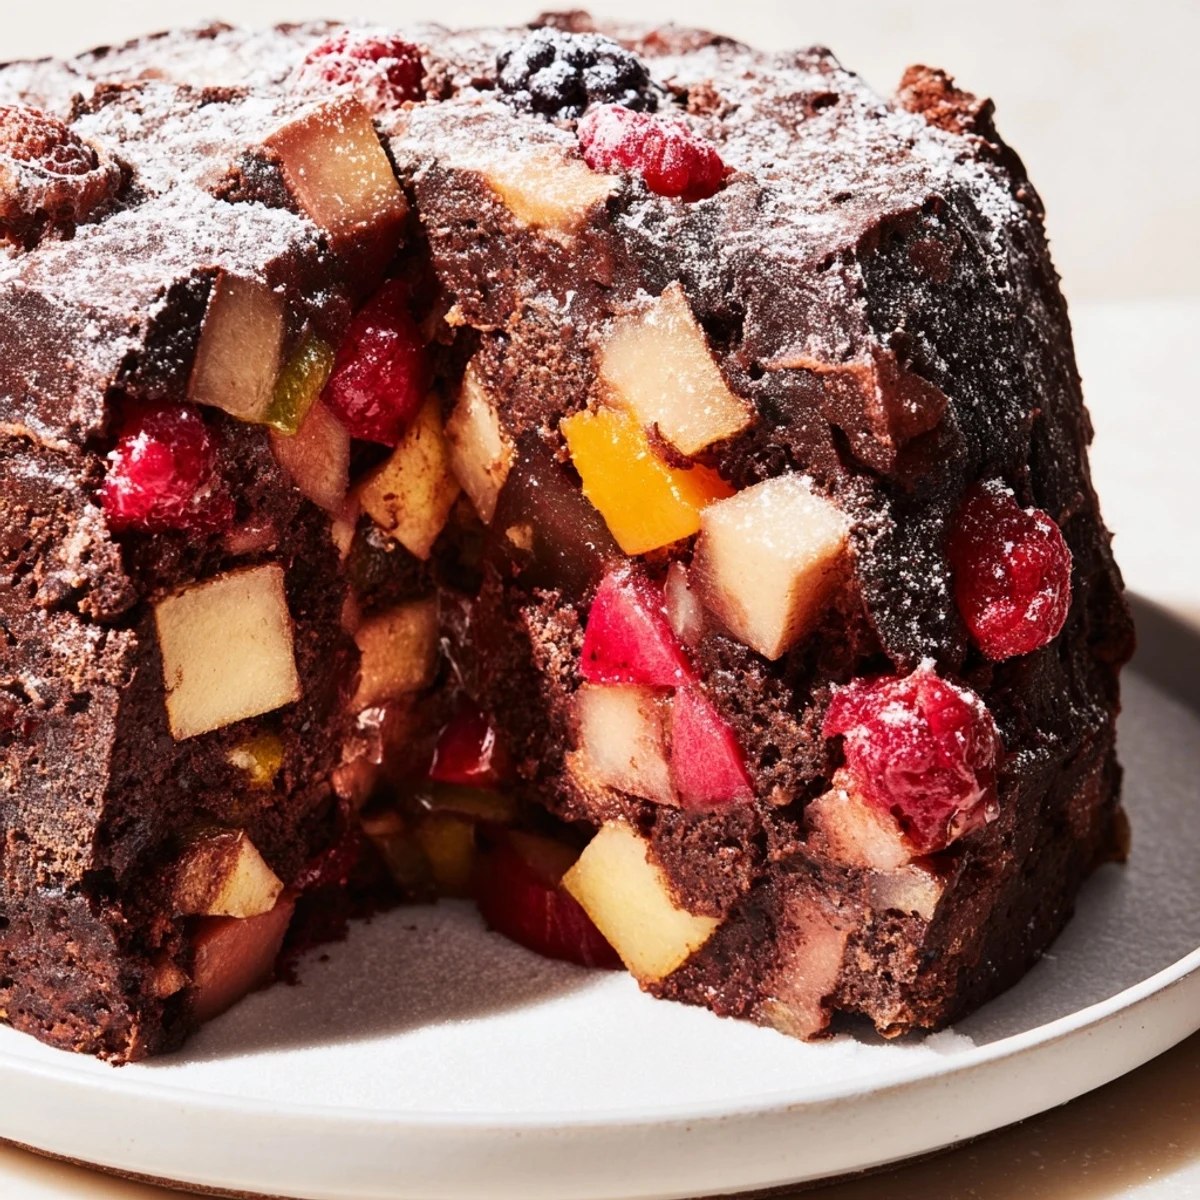
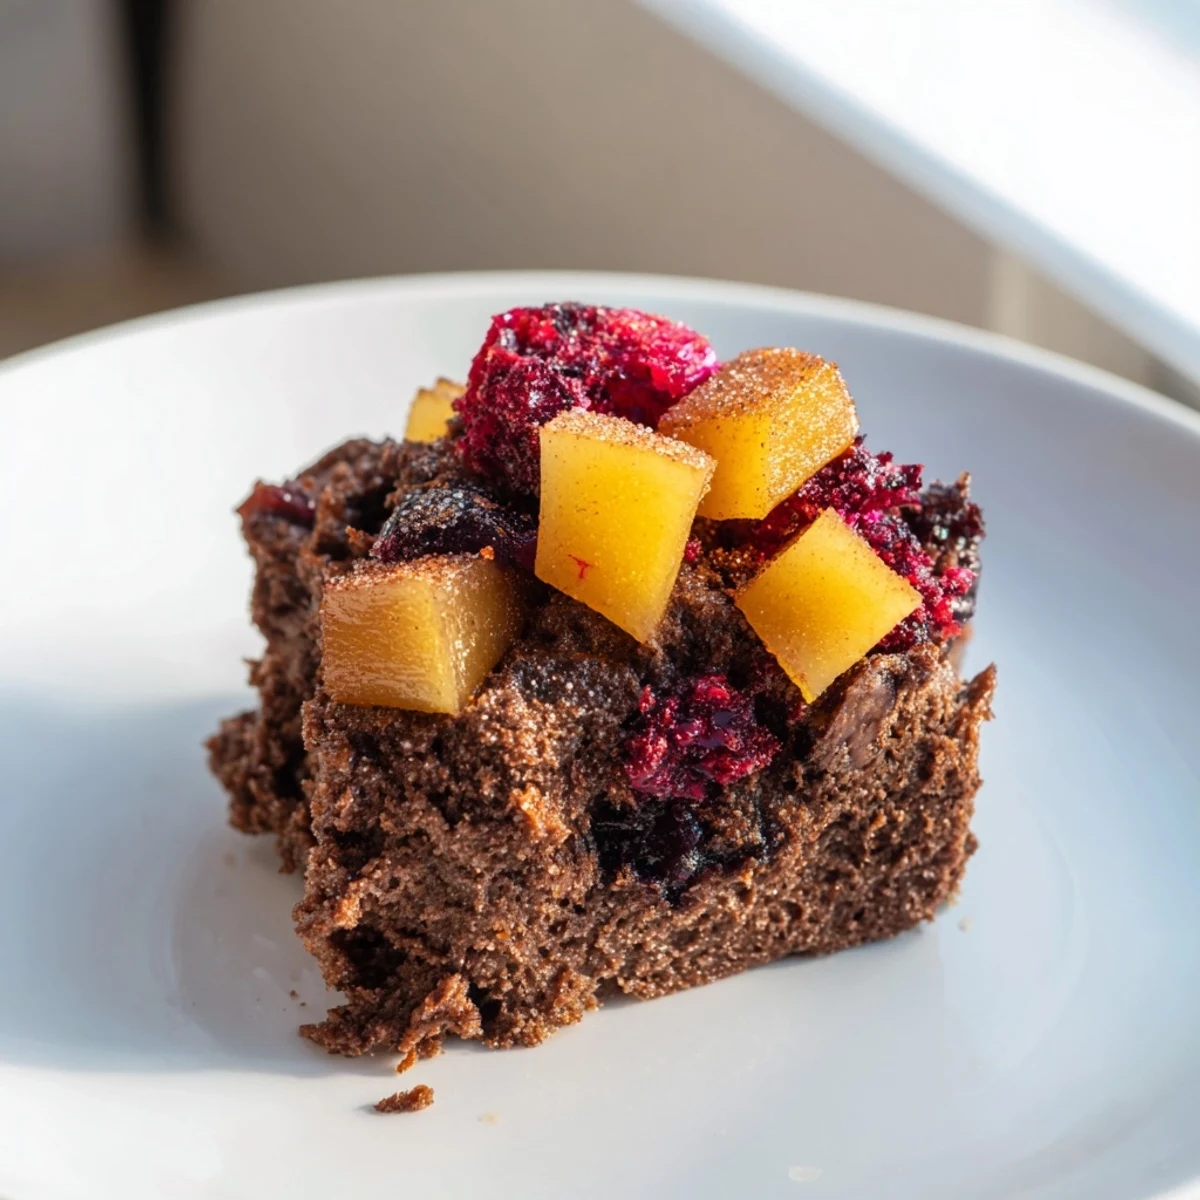
Save This moist and flavorful cake combines the natural sweetness of ripe pears with rich cocoa and bursts of mixed berries to create a delightful treat. The batter is carefully crafted with all-purpose flour, cocoa powder, and a touch of baking soda to achieve a tender crumb. Softened butter and yogurt lend moisture and richness, while the vanilla extract enhances the overall aroma. Baked to perfection at 350°F, the cake offers a balance of fruity juiciness and chocolate depth. Ideal for an easy dessert, it can be enjoyed warm, optionally dusted with powdered sugar or paired with vanilla ice cream for extra indulgence.
I discovered this Pear Cocoa Berry Cake on a quiet autumn afternoon when my neighbor brought over a basket of fresh pears from her garden. I'd been craving something chocolatey but not too heavy, and the idea of swirling those juicy pears with cocoa and bright berries just felt right. That first slice, still warm from the oven with the pears practically melting into the crumb, reminded me why I love baking—it's those moments when simple ingredients become something that makes people pause mid-conversation just to savor another bite.
I'll never forget the first time I made this for my book club. Everyone arrived expecting the usual store-bought dessert, and when they tasted this warm slice with a scoop of vanilla ice cream melting into the cocoa crumb, the room got quiet in that special way that only happens when food truly lands. My friend Sarah asked for the recipe right there at the table, and it's become her signature dessert ever since.
Ingredients
- 2 ripe pears, peeled, cored, and diced: Choose pears that yield slightly to pressure—they're at their sweetest and juiciest that way. If your pears feel hard, give them a day on the counter. Dice them just before mixing to prevent browning.
- 1 cup mixed berries (fresh or frozen): Frozen berries work beautifully here and won't bleed their color as much as fresh ones sometimes do. If using fresh, pat them dry first so they don't make the batter soggy.
- 1 1/2 cups all-purpose flour: Spoon it into your measuring cup and level it off rather than scooping directly—it makes a real difference in texture.
- 1/3 cup unsweetened cocoa powder: Dutch-process cocoa gives a richer, darker flavor if you have it on hand, though regular works wonderfully too.
- 1 1/2 tsp baking powder and 1/2 tsp baking soda: These are what give you that tender crumb and gentle rise. Don't skip sifting them with the flour for the most even distribution.
- 1/4 tsp salt: This tiny amount makes the chocolate taste more like chocolate—trust it.
- 1/2 cup unsalted butter, softened: Leave it on the counter for 20 minutes until it's actually soft. Cold butter won't cream properly, and that's where the fluffiness comes from.
- 3/4 cup granulated sugar: Creaming this with butter incorporates air, which is the secret to avoiding a dense cake.
- 2 large eggs: Room temperature eggs blend more smoothly and create better texture. Pop them in warm water for a few minutes before using.
- 1 tsp vanilla extract: A small amount, but it rounds out all the other flavors beautifully.
- 3/4 cup plain yogurt: This keeps everything moist and adds a subtle tang that deepens the chocolate flavor. Sour cream works too if that's what you have.
Instructions
- Get your oven ready and prepare the pan:
- Preheat your oven to 350°F. While it's warming, grease your 9-inch cake pan thoroughly—I use a bit of softened butter and a light dusting of flour, making sure to get into all the corners. This step matters more than you'd think.
- Combine all the dry ingredients:
- In a medium bowl, whisk together the flour, cocoa powder, baking powder, baking soda, and salt. Whisking aerates the flour and ensures everything is evenly distributed. You should see no lumps of cocoa, and the mixture should look like dark sandy soil.
- Cream your butter and sugar:
- In a large bowl, beat the softened butter and sugar together for about 2–3 minutes until it's pale, fluffy, and noticeably lighter than when you started. This is where the lift comes from, so don't rush it. You're essentially incorporating tiny air bubbles that make the final cake tender.
- Add your eggs one at a time:
- Crack one egg into the butter mixture, beat it well until it's fully incorporated before adding the next. This might take a minute per egg, and yes, it matters. Add the vanilla extract and give it another good stir.
- Alternate wet and dry ingredients:
- Add half of your dry ingredient mixture, stir until just combined. Then add all of the yogurt and fold gently. Finally, add the remaining dry ingredients and fold until you just don't see streaks of flour anymore. Overmixing develops gluten and toughens the cake, so be gentle here.
- Fold in the fruit:
- Now gently fold in your diced pears and berries. The batter should look studded with fruit, and everything should feel cohesive but still tender.
- Get it into the oven:
- Pour the batter into your prepared pan and smooth the top gently with a spatula. Place it in the center of your preheated oven.
- Bake until just done:
- Bake for 38–42 minutes. You'll know it's ready when a toothpick inserted into the center comes out clean or with just a tiny crumb clinging to it. The top should look set but not hard, and you should smell chocolate and caramelized fruit.
- Cool with patience:
- Let the cake rest in the pan for 10 minutes—this helps it set enough to turn out safely. Then carefully turn it onto a wire rack. Once it's completely cool, dust with powdered sugar if you'd like, or leave it naked and let the cocoa color shine through.
 Save
Save The moment I realized this cake was truly special was when my grandmother, who is rarely impressed by anything sweet, took a second slice and asked if I'd finally learned to bake properly. She said the pears reminded her of a cake her mother used to make, and suddenly this recipe became a bridge between generations. Food has that quiet power sometimes.
Variations and Flavor Swaps
Once you understand this recipe, it becomes a beautiful canvas. I've made it with diced apples instead of pears on mornings when my fruit bowl was looking desperate, and it's just as lovely. You could add a tablespoon of espresso powder to deepen the chocolate, or swap half the yogurt for Greek yogurt if you want something richer and more decadent. I've even scattered chopped walnuts on top before baking, which adds this lovely toasted nuttiness that plays beautifully against the fruit and cocoa.
Serving and Storage Ideas
This cake is honestly perfect served warm with vanilla ice cream, but it's equally good the next day at room temperature with a cup of coffee. Wrapped well, it keeps beautifully for up to four days, and somehow the flavors actually deepen slightly as it sits. If you have leftovers—which is rare in my house—you can freeze individual slices wrapped in parchment for up to three months. Just thaw at room temperature when you need a moment of comfort.
The Magic of Making Cake Together
There's something about baking this particular cake that invites company into the kitchen. Maybe it's the warmth of the cocoa, or the way the pears and berries make it feel seasonal and special, or simply that it doesn't require complicated techniques. I've made it with my nieces on Sunday afternoons, with friends who claim they can't bake, and even solo on nights when I just needed something beautiful to emerge from my oven. Every time, it turns out just right—tender, moist, with those little bursts of fruit and chocolate that make you close your eyes for a second.
- Don't be intimidated by the creaming step—it's just butter and sugar getting fluffy together, and it actually feels nice.
- Use your senses more than your timer—every oven is different, so start checking at 38 minutes rather than waiting for 42.
- This cake improves with a day of rest, so make it ahead if you're feeling smart about dinner party planning.
 Save
Save This cake has become my answer to almost everything—when someone needs comfort, when I want to impress without stress, when autumn arrives and I suddenly want to bake. I hope it becomes that for you too.
Recipe FAQs
- → How do the pears affect the texture?
-
The diced pears add moisture and a tender bite, keeping the cake soft and flavorful throughout.
- → Can frozen berries be used instead of fresh?
-
Yes, frozen berries can be used; just thaw and drain excess liquid to prevent a soggy batter.
- → What variations can enhance the cake's texture?
-
Adding chopped walnuts or pecans introduces a pleasant crunch and complements the soft crumb.
- → Is it possible to make this cake gluten-free?
-
Replacing all-purpose flour with gluten-free flour blends works well but may slightly alter the crumb.
- → What is the best way to check doneness?
-
Insert a toothpick into the center; it should come out clean or with a few moist crumbs when done.